A validation holds the rules for one table. In the header you choose the table and how strict the validation is. In the lines you define the rules per field. You can create a validation by hand or with the wizard. This page shows the steps. Every field is explained in the validation fields reference.
¶ Warning or error
The Validation Type in the header decides what happens when a record breaks a rule.
- Warning: a message appears, but the user can continue and the change is saved.
- Error: a message appears and the change is reversed. The user cannot save the record until the data is correct.
Use a warning to guide users and an error to protect data that must always be right. A good way to introduce a rule is to start with a warning, look at the findings with Check Table, clean up the data, and then switch to an error. See the recipe Mandatory field: warning first, then error.
Action after Validation is only available with the validation type Warning. If you change a validation with actions to Error, Business Central asks for confirmation and deletes the actions.
¶ Create a validation by hand
- Search for Field Validations and choose New.

- Fill in the General FastTab. Choose the Table ID first: the number from the number series is then filled in. Set the Validation Type and give the validation a clear Description.

- Add the rules on the Lines FastTab. Each line is one rule: choose the Type, the field and, where needed, the Validation Value. Not sure which type to use? See Which rule type do I need?.
- Optional: set Conditions, so the rules only run in certain situations, for example only when a card is not blocked or an order is released. See Table relations for conditions on a related table.
- Set a Starting Date of today or earlier and sign in again. See When a validation is active.
Choose Show more on the header to see the extra fields, such as Insert Check, Display results in message and Ending Date.
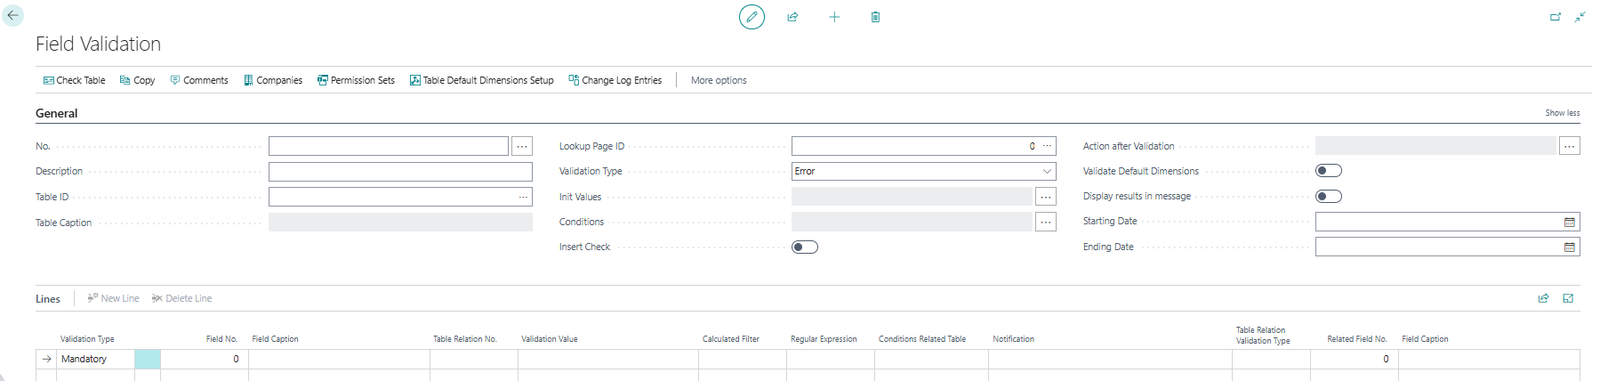
¶ Create a validation with the wizard
The wizard is the quickest way to create a simple validation. You can use it once the app is registered.
- Search for Field Validation Setup Wizard and open it.
- In Table ID, choose the table. Use the drop-down to search, or type the table ID or name.
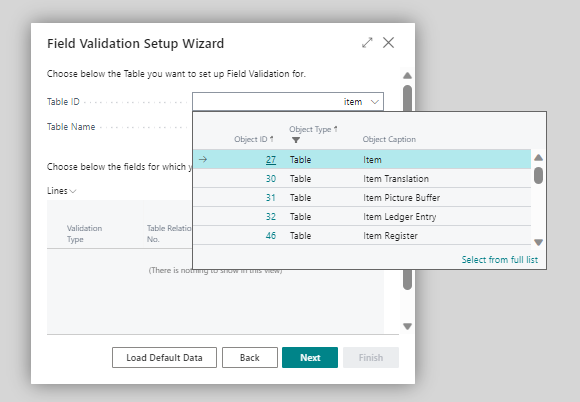
- In the lines, choose the type of each rule, the field, and how the data is checked.
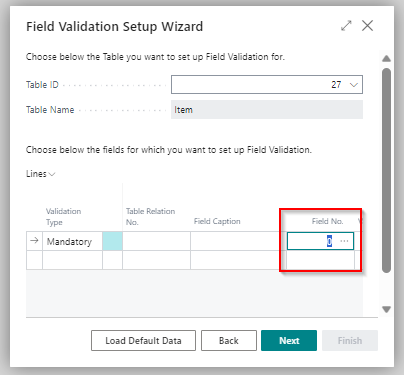
- Choose Next and then Finish.
The wizard creates the validation and uses the current date as the starting date. If you need initial values or conditions, open the new validation and set them there. Closing the wizard before Finish deletes the unfinished validation.
¶ Scope: companies and permission sets
A new validation applies to all companies and all users that have 2C FIELDVAL USE. To limit it, select the validation in the list and choose:
- Companies: valid for specific companies only.
- Permission Sets: valid for users who have one of the selected permission sets only.
¶ When a validation is active
A validation does not run when:
- the Starting Date is empty or in the future;
- the Ending Date is in the past;
- the user does not have the permission set
2C FIELDVAL USE; - the validation is limited to other companies or permission sets;
- the Conditions are not met.
Validations are loaded when a user signs in. After you create or change a validation, the user who set it up and all users it applies to must sign out and sign in again.
By default, a validation is checked when a record is modified. To check new records too, turn on Insert Check under Show more.
¶ Actions in the Field Validations list

- Manage: edit, view or delete the selected validation.
- Check Table: see Check Table.
- Copy: copy the selected validation to a new one.
- Comments: add comments to the validation.
- Companies: make the validation valid for specific companies instead of all companies.
- Permission Sets: make the validation valid for one or more permission sets only.
- Change Log Entries: see the changes made to the validation after it was created. This needs Change Log Activated on the setup page.
¶ What a user sees
The findings are listed on the Field Validation Results page, with the message of each rule.
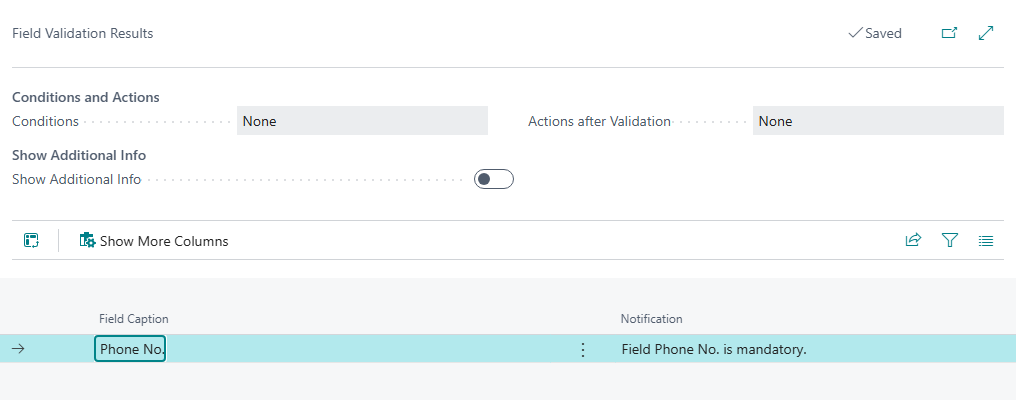
The results page for a rule of the type Warning
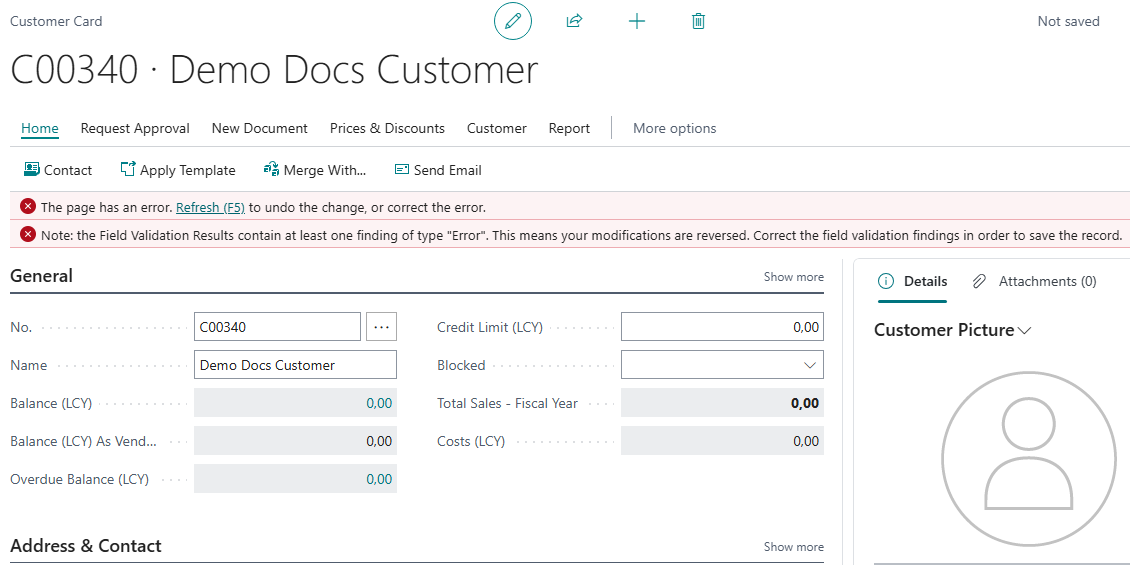
With the type Error the change is reversed
Last reviewed: October 2026.